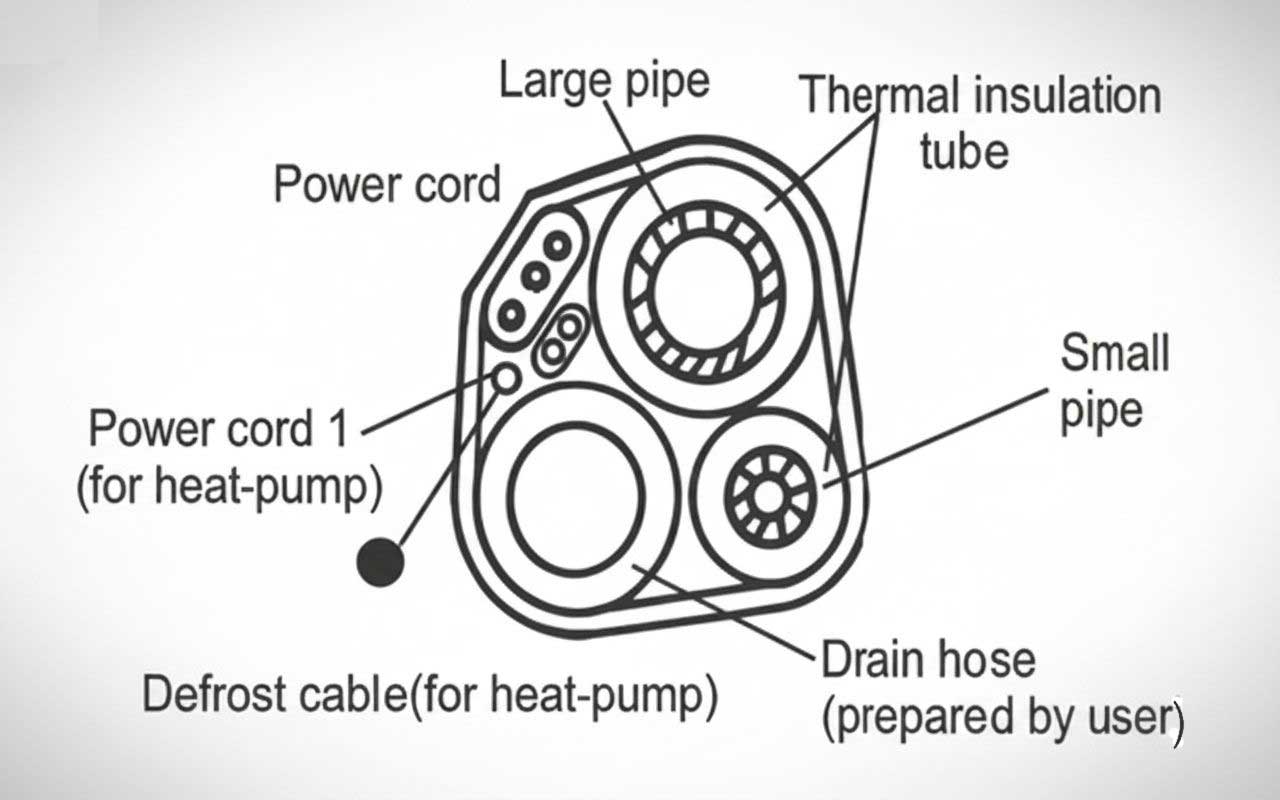
Piping thermal insulation and connection
Recommendation Piping Joints Thermal Insulation:
Wrap the piping joints with thermal insulation materials and then wrap with a vinyl tape.
Piping Thermal Insulation:
- ♦Place the drain hose under the piping.
- ♦Insulation material uses polythene foam over 6mm in thickness.
- ♦Drain hose is prepared by user.
- ♦Drain pipe should point downward for easy drain flow.
- ♦Do not arrange the drain pipe twisted, sticking out or wave around, and do not immerse the end of it in water.
- ♦If an extension drain hose is connected to the drain pipe, make sure to thermal insulated when passing along the indoor unit.
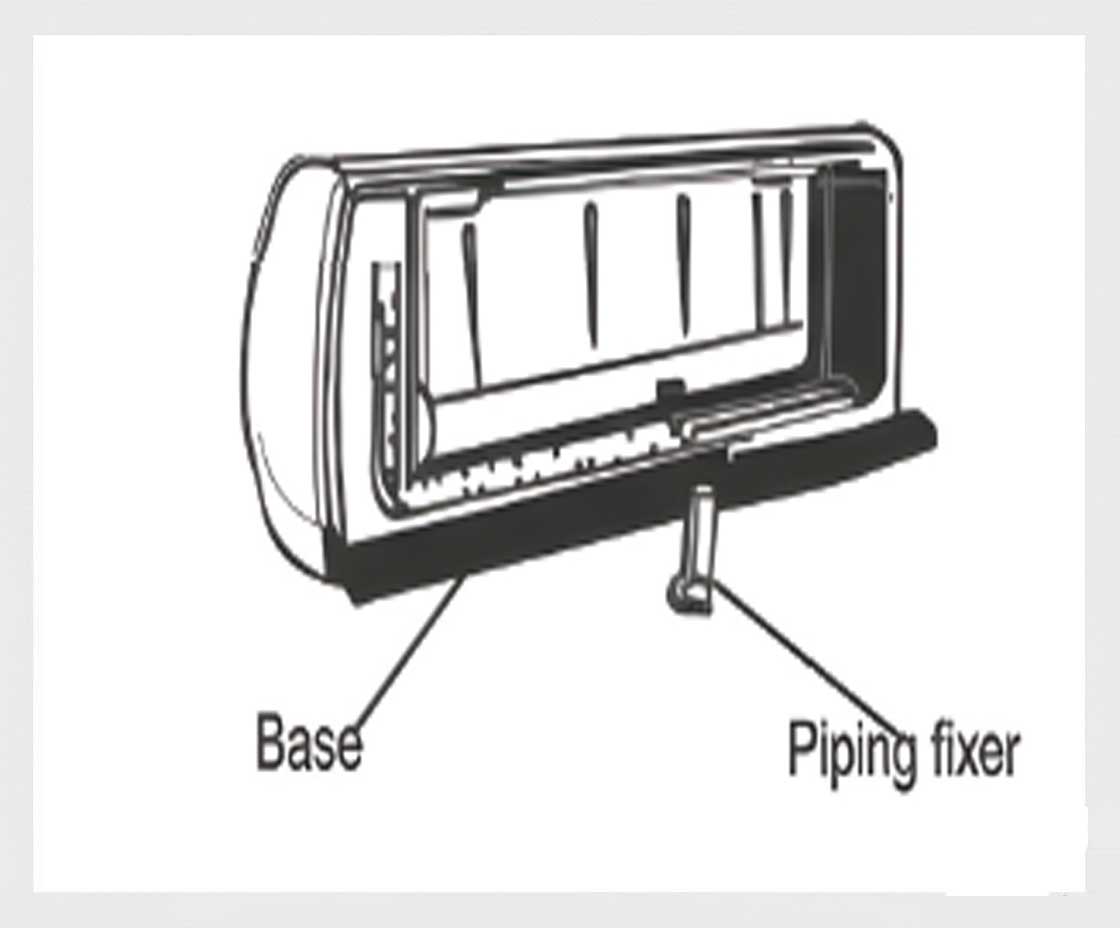
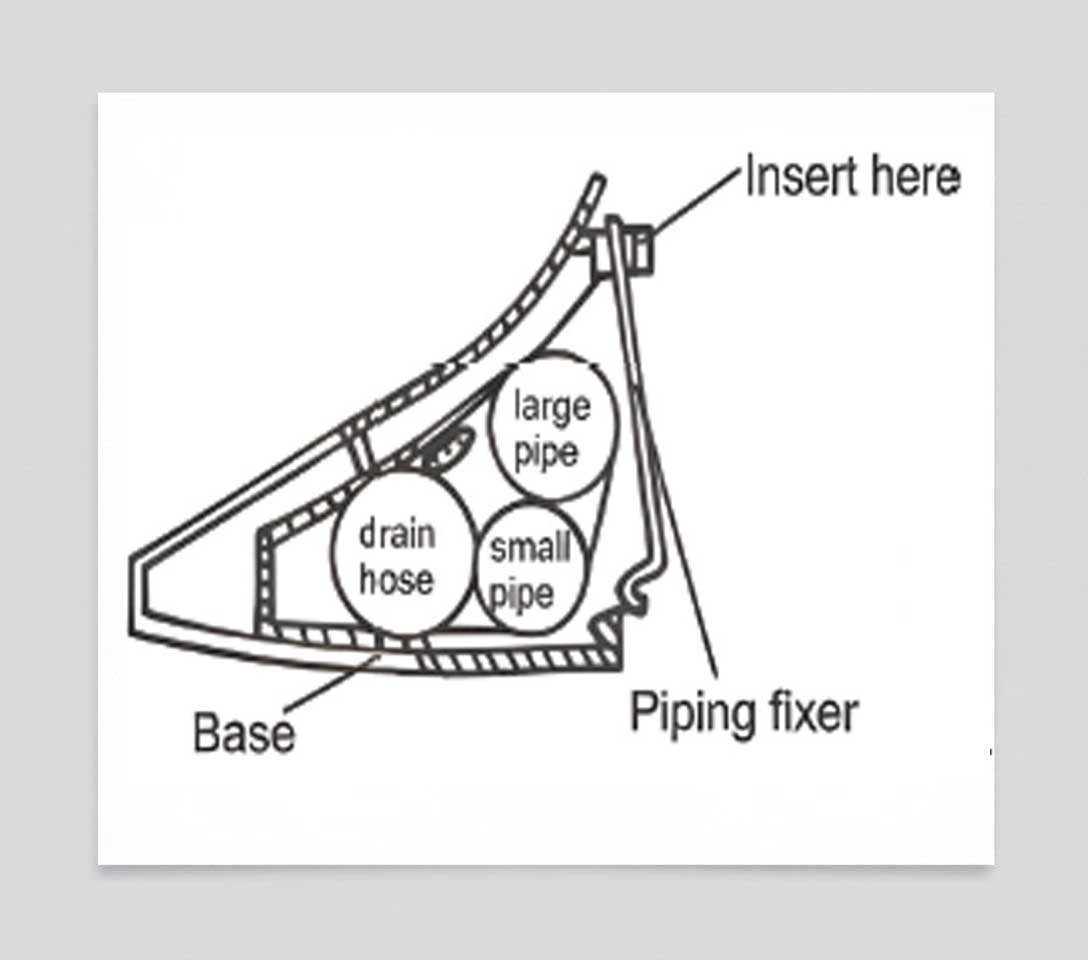
- ♦When the piping is directed to the right, piping, power cord and drain pipe should be thermal insulated and fixed onto the back of the unit with a piping fixer.
Pipe Fixer
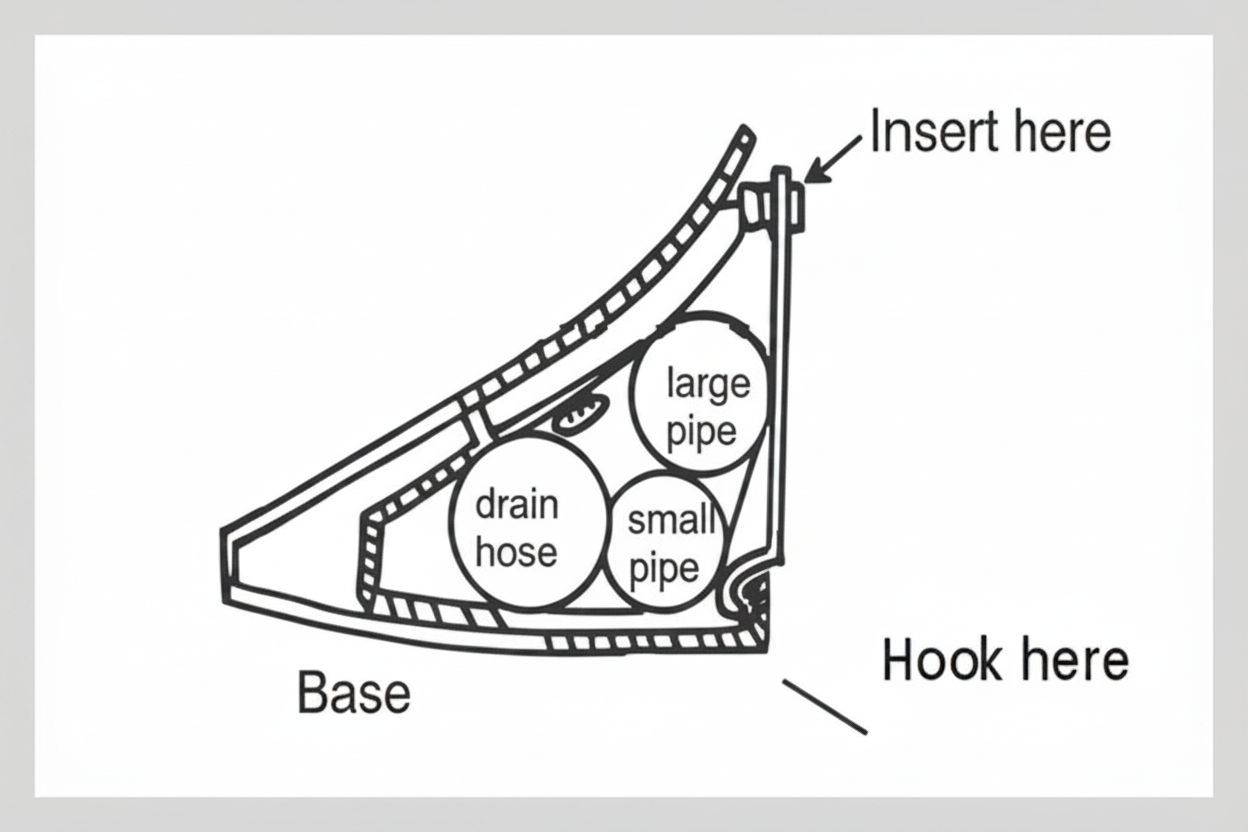
Piping Connection:
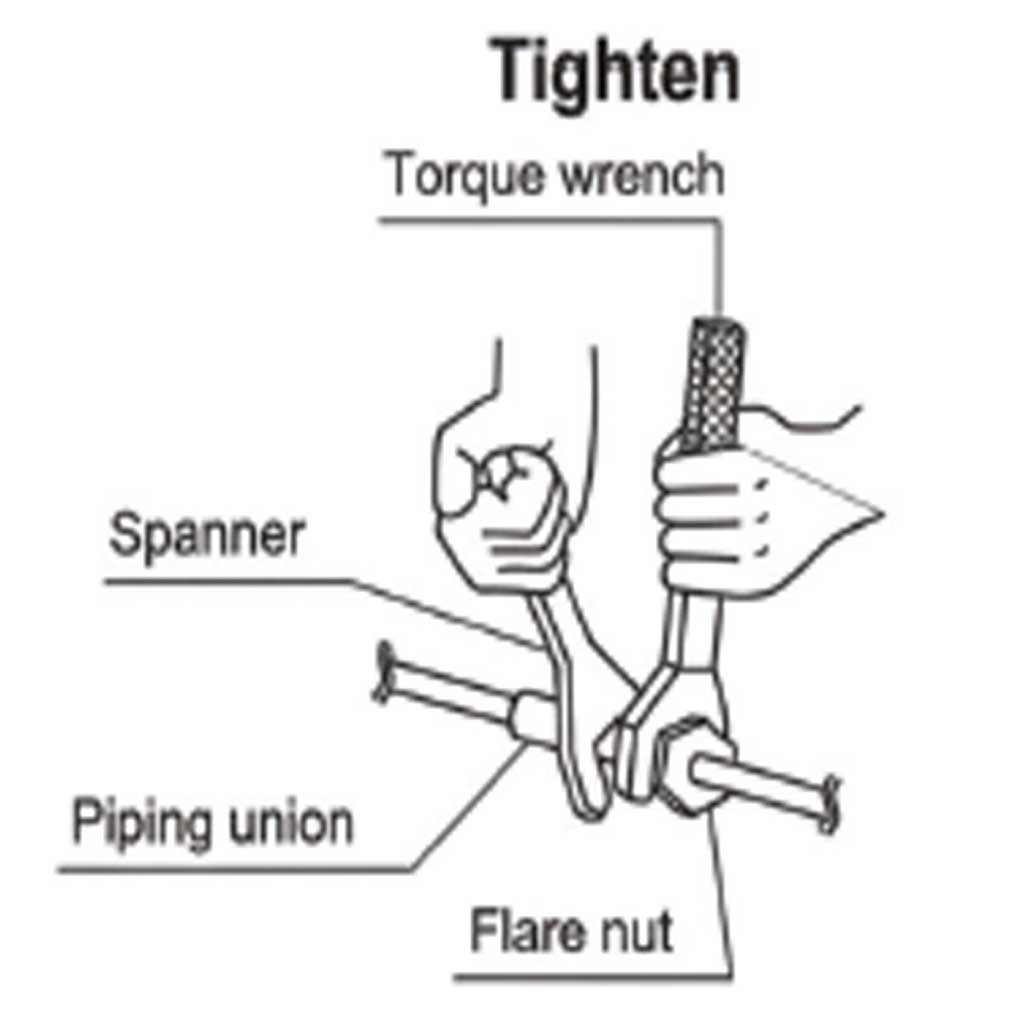
A. Connect indoor unit pipes with two fix spanners. Pay special attention to the allowed torque as shown below to prevent the pipes, connectors and flare nuts from being deformed and damaged. Do not use adjustable wrenches.
B. Pre-tighten them with fingers at first, then use the spanners.
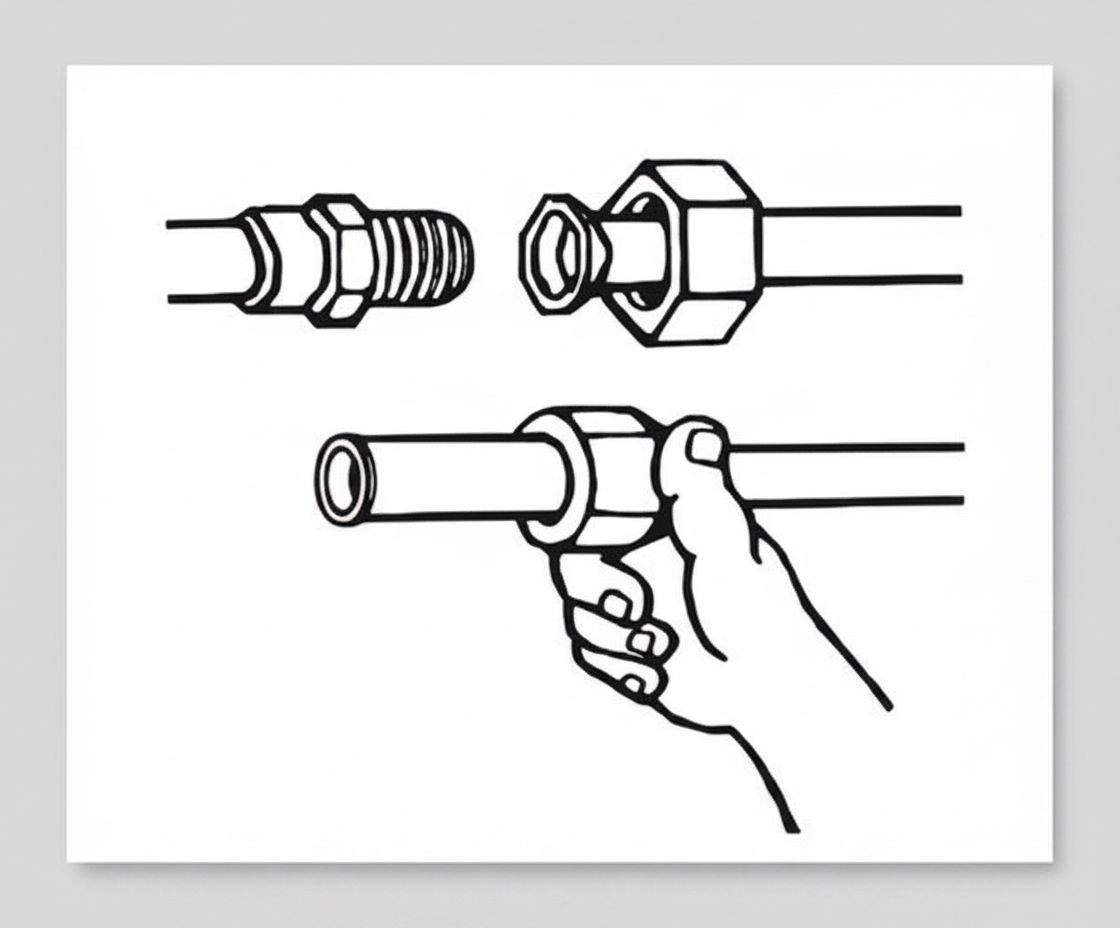
CAUTION
Use the flare nut fixed to the main unit. This is to prevent the flare nut from cracking as a result of deterioration over time.
To prevent gas leakage, apply refrigeration oil only to the inner surface of the flare. Use refrigeration oil for R410A.
Use a torque wrench when tightening the flare nuts to prevent damage to the flare nuts and gas leakage.
Align the centers of both flares and tighten the flare nuts 3 or 4 turns by hand, then tighten them fully with a spanner and a torque wrench.
Apply oil
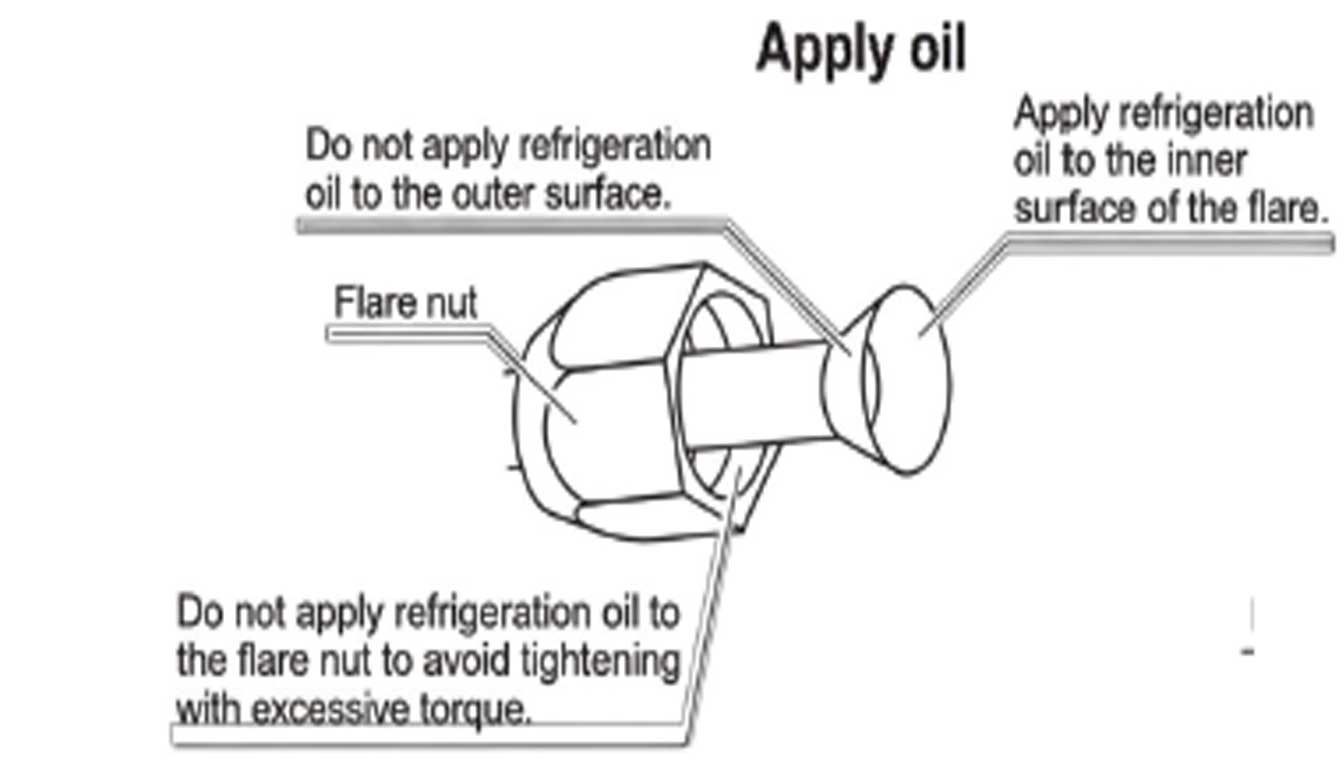
Tighten